Pages

Showing posts with label nails. Show all posts

Thursday, August 8, 2013

Just Another Mani...Thursday?

We are back from our amazing trip to...Hawaii!  If we could move our families there, we would be residents without a second thought.  I truly believe our hearts are in the Islands.

Here are some pictures from our trip

China Walls in Hawaii Kai

Hiking Maunawili Falls BAREFOOT

Evidence of the bare feet...Desperately needed a pedi when I returned

Sunset from one of our balconies in Waikiki

Watching the storm roll in from Pali Highway

Unfortunately, all good things must come to an end, right?  We returned and I hit the ground running getting ready for back to school.  I'll do some posts and room tours in upcoming blog posts.  It seems to be the only thing I can think about these days...teacher probs.

I'm running behind on my usual Mani Monday post, but figured I'd go ahead and post on Thursday instead of making you wait until Monday.  You're welcome. 


This post is to show you don't have to spend a ton of $$$ to get good quality & fun polish!  While we were in HI, my husband and I stopped in one of the ABC Stores (one of a million...seriously).  I stopped in my tracks when I saw the Island Girl polish display.  There were tons of fun colors and glitters that resembled OPI & Deborah Lippmann polishes.  Hubby gave me the thumbs up to buy some since they were only $2.99 each..YES!  ONLY $2.99 a bottle!!

Island Surf by Island Girl

This fun polish is hot pink with multi-colored confetti and glitter.  When I first saw it, I told Hubby that it looks like cupcake sprinkles!  & There's nothing I love more than cupcakes with sprinkles!

Products Used
Sally Hansen Gel Cuticle Remover with Kiwi
Smooth Cuticle Pusher
Buffer Block
Orly Bonder
Island Girl Island Surf
Poshe Super Fast Drying Top Coat


I've spent every day this past week in my classroom & couldn't not post a picture of my mani using some new school supplies.  How cute are these neon Ticonderoga pencils (the best pencils IMO...teacher probs)?!


Give aloha every day!


Best,
Juliana


Sunday, July 21, 2013

Just Another Mani Monday: Vacation Nails

I'm so excited!  I feel like I'm going to jump out of my skin!  My husband and I will be leaving for a tropical destination (hello fruity drinks & sandy toes!).

Naturally, tropical destinations call for a vacay mani!!

This fun mani was time-consuming, but so worth it.  The time-consuming part is waiting for each layer to dry.  I'm so happy about how it turned out and am so thankful for Pinterest for having so many wonderful tips.

Vacay Mani


Products Used
Orly Bonder Base Coat (love this stuff)
Essie Pink Parka
OPI for Sephora It Looks Like Reindeer
Poshe Super Fast Drying Top Coat
Orange Stick with Flat Side (for cleaning around the nails)
Paper Hole Protectors for the Half Moons
Tape for the Thumb Lines (I used masking because I couldn't find painters tape)

  1. Begin by applying your base coat.  I love Orly Bonder because it creates a rubber cement type base to really hold on to your polish.  When I use the Bonder, my mani lasts 2 weeks.
  2. Apply your polish to your nails.  I included a party nail on both my ring fingers & thumbs.  
  3. Apply your favorite top coat.  I like Poshe Super Fast Drying Top Coat because it sets the polish, smooths any imperfections, and completely dries it in 5 minutes.
  4. Once your base mani is completely dry.  Begin placing your hole protectors to your nails.  I placed mine on the tips except my thumb.  (You could do it at your cuticle and create a half moon look at the base of your nail.)
  5. Make sure you have pressed on all sides of the hold protectors before applying the different colored polish.  If it's not sealed, it will not be an even line.  Apply a few coats to the half circle area until opaque.  
  6. Allow to dry.  I just blew on my fingers.  Carefully remove the hole protectors and apply your top coat.
  7. Finally, tear 2 pieces of tape.  Apply one tape to one side of your thumb nail and the other piece to the opposite side.  By doing this, you are creating a line down the center of your thumb nail.  This part can be tricky because it is hard to get it completely centered.  Just know that with practice, it'll get better (& really...only you are going to notice).
  8. Now that the tape is down, apply polish to the lines.  Allow the lines to completely dry.  
  9. Remove the tape carefully & apply your top coat.  
Voila!

Bon voyage,
Juliana


Wednesday, July 17, 2013

PINspiration: Pretty Nail Polish Organization

Happy Hump Dayayayay!! (in my best Geico camel voice...please tell me you've seen the commercial...)

Lately, I've been into quick & inexpensive ways to update spaces in my home that have become...well..stale.

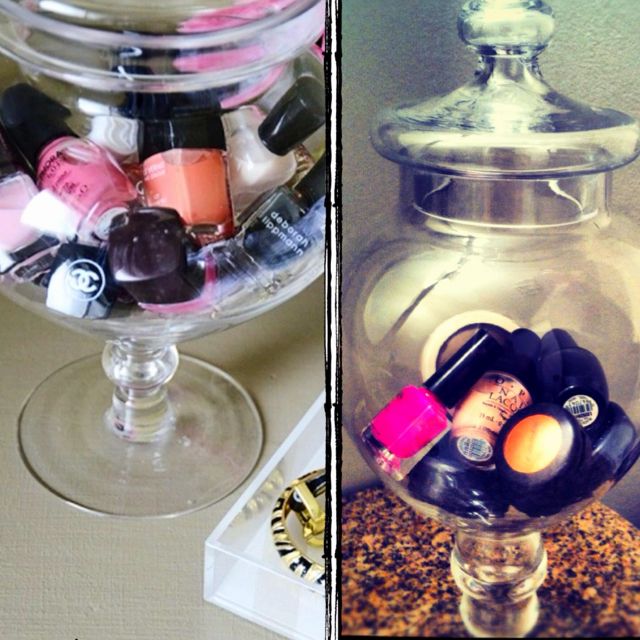
I was inspired by some pins on Pinterest showing nail polish storage in apothecary jars.  Before, I hid my beautiful polish collection in a medicine style cabinet in the guest half-bath.  But after seeing these photos, I realized these gorgeous little bottles should be displayed!

Here were my inspiration photos:


Once I spotted the perfect apothecary jar (birds have such a special meaning to me), I set out to update my space.

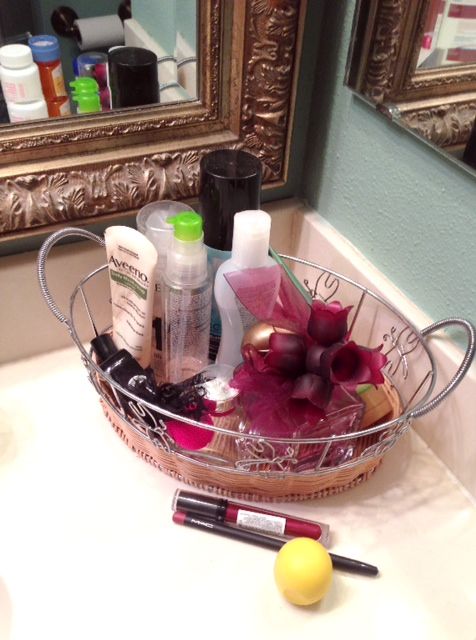
Before
Cluttered mish-mash of perfumes, hair products and lotions.


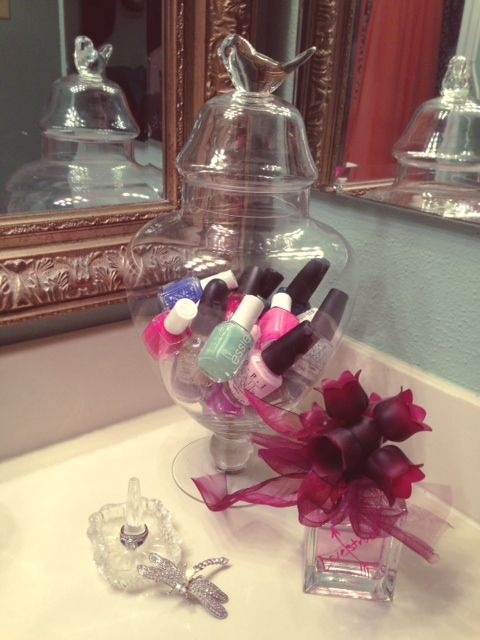
After
Don't the bottles look like candy?
(Some of my polish)

Automatically, the space looks fresh & clean!  Some times it doesn't take a lot of money or effort to make a huge change.


Best,
Juliana


Monday, July 15, 2013

Just another Mani Monday

I love going to get a pedi treat with my mom (usually once a month), but rarely do I have the patience to sit at the nail place for hours getting my toes and fingers done.  Not to mention, regular manis can really add up (or subtract!) in the wallet!  In the long run, pro manis usually aren't worth it for me unless I have a special occasion because being a teacher means I'm using my hands all day which means wear & chippage on the pretty new manis.

I choose to do my manis at home using tried and true products that I've discovered over the years.  Using the products I've found, I can make my manis last 2+ weeks.  Usually, the only reason I am changing my polish is because I have growth or I'm bored!

I have quite the collection of polishes (my husband might suggest it's an addiction...).  I've been trying to find ways to recycle polishes & make room for new pretty colors like swapping polishes with friends.  Walking into Ulta and not purchasing a pretty new shade is IMPOSSIBLE!


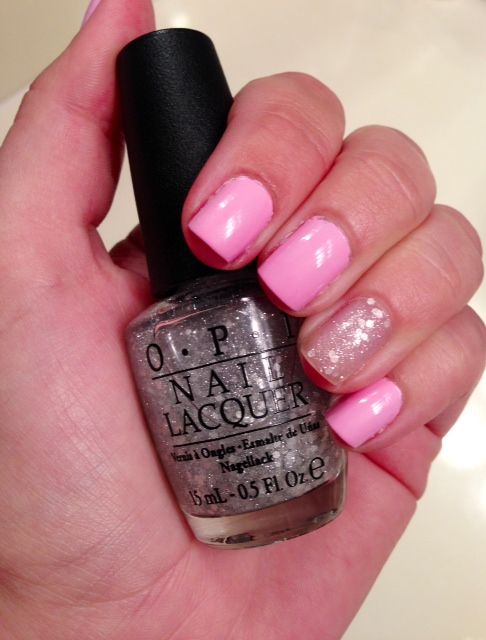
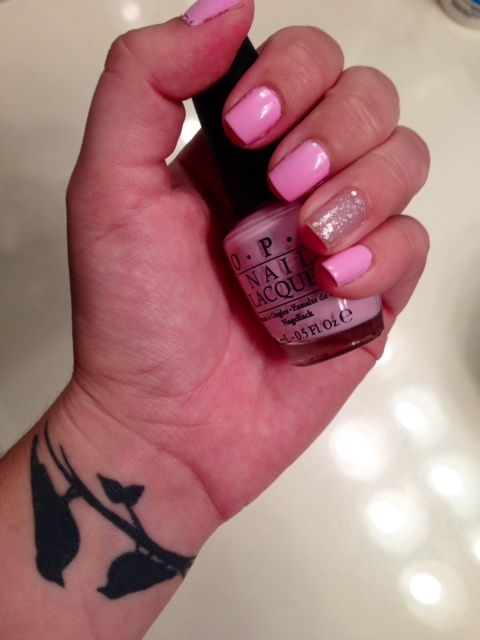
Here is this week's mani:


OPI Pirouette My Whistle


OPI Mod About You

Products Used
Sally Hansen Gel Cuticle Remover with Kiwi
Smooth Cuticle Pusher
Buffer Block
Orly Bonder
OPI Mod About You
OPI Matte Top Coat (between coats)
OPI Pirouette My Whistle
Poshe Super Fast Drying Top Coat


Best,
Juliana