Naturally, tropical destinations call for a vacay mani!!
This fun mani was time-consuming, but so worth it. The time-consuming part is waiting for each layer to dry. I'm so happy about how it turned out and am so thankful for Pinterest for having so many wonderful tips.
.JPG)
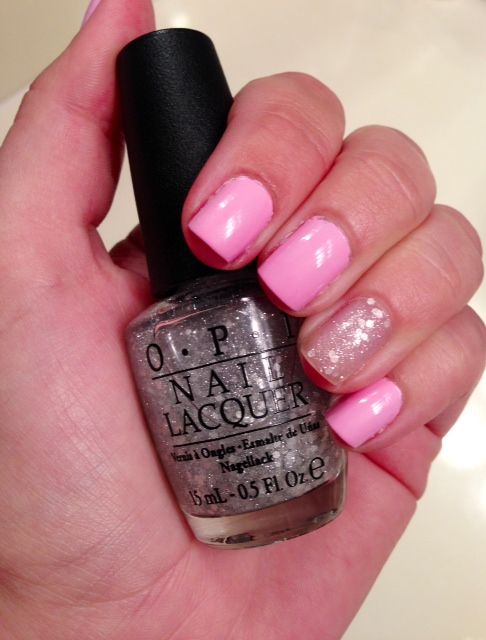
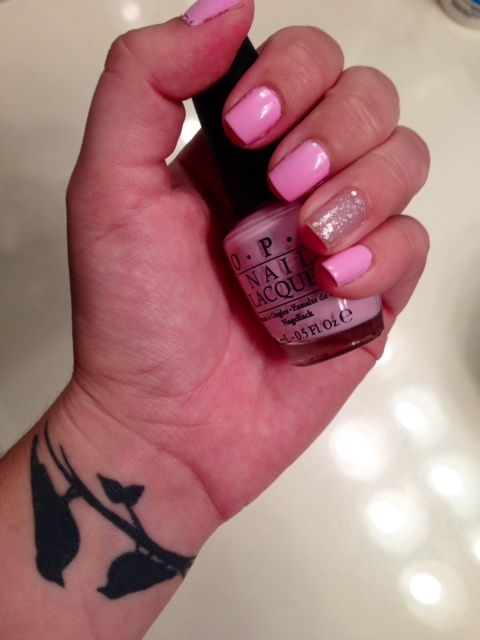
Vacay Mani

Products Used
Orly Bonder Base Coat (love this stuff)
Essie Pink Parka
OPI for Sephora It Looks Like Reindeer
Poshe Super Fast Drying Top Coat
Orange Stick with Flat Side (for cleaning around the nails)
Paper Hole Protectors for the Half Moons
Tape for the Thumb Lines (I used masking because I couldn't find painters tape)
- Begin by applying your base coat. I love Orly Bonder because it creates a rubber cement type base to really hold on to your polish. When I use the Bonder, my mani lasts 2 weeks.
- Apply your polish to your nails. I included a party nail on both my ring fingers & thumbs.
- Apply your favorite top coat. I like Poshe Super Fast Drying Top Coat because it sets the polish, smooths any imperfections, and completely dries it in 5 minutes.
- Once your base mani is completely dry. Begin placing your hole protectors to your nails. I placed mine on the tips except my thumb. (You could do it at your cuticle and create a half moon look at the base of your nail.)
- Make sure you have pressed on all sides of the hold protectors before applying the different colored polish. If it's not sealed, it will not be an even line. Apply a few coats to the half circle area until opaque.
- Allow to dry. I just blew on my fingers. Carefully remove the hole protectors and apply your top coat.
- Finally, tear 2 pieces of tape. Apply one tape to one side of your thumb nail and the other piece to the opposite side. By doing this, you are creating a line down the center of your thumb nail. This part can be tricky because it is hard to get it completely centered. Just know that with practice, it'll get better (& really...only you are going to notice).
- Now that the tape is down, apply polish to the lines. Allow the lines to completely dry.
- Remove the tape carefully & apply your top coat.
.JPG)
Voila!
Bon voyage,
Juliana